What Do You Soak Garlic In Before You Plant It? A Complete Guide for Successful Gardening

Garlic is a versatile and rewarding crop that many gardeners choose to grow. However, to ensure a successful harvest, it’s crucial to prepare the garlic properly before planting. One of the most effective methods to promote healthy growth and combat pests is soaking the garlic bulbs in specific solutions. In this complete guide, we’ll explore the various soaking methods, including the types of solutions you can use, the benefits they offer, and the optimal soaking times. Whether you're a seasoned gardener or a novice, this guide will equip you with the knowledge to enhance your garlic-growing experience.
What Do You Soak Garlic In Before You Plant It?
Soaking garlic before planting can enhance germination and provide a protective barrier against pests and diseases. A common solution used for soaking is a mix of water and strong materials like hydrogen peroxide, which helps to eliminate potential issues like mold and fungi on the cloves. Additionally, some gardeners use a diluted seaweed extract to supply essential nutrients that can benefit the growth of the garlic once planted. The soaking duration typically ranges from 30 minutes to a few hours, depending on the method chosen, allowing the garlic to absorb beneficial compounds while also preparing it for a strong start in the soil.
Why Soak Garlic Before Planting?
Soaking garlic before planting serves multiple purposes, primarily to encourage healthy growth and prevent disease. By soaking, you can soften the protective skin and activate the germination process, which leads to quicker root establishment once planted. This practice can also help to wash away any harmful bacteria or fungi that may be present on the garlic's surface, creating a safer environment for the cloves to thrive.
What Solutions Can Be Used for Soaking Garlic?
The most common solutions for soaking garlic include plain water, hydrogen peroxide, and liquid fertilizers like seaweed extract. Water alone is adequate for basic soaking, but adding hydrogen peroxide can enhance the antimicrobial properties by killing pathogens. Seaweed extract offers added nutrients, promoting vigorous growth and boosting the plant's immunity against stress. Each option serves its unique purpose, allowing gardeners to choose based on their specific needs.
How Long Should Garlic Be Soaked?
The soaking duration for garlic generally ranges from 30 minutes to 12 hours, depending on the solution used and the gardener's preference. For mild solutions like water, a shorter soak of 30 minutes is often sufficient. However, with stronger solutions, like hydrogen peroxide, a quick dip of 10 to 15 minutes is advisable to prevent any potential harm to the garlic cloves. Timing is crucial, as over-soaking can lead to damage or rot.
Are There Any Risks to Soaking Garlic?
While soaking garlic can provide multiple benefits, there are some risks involved. Over-soaking can cause the cloves to absorb too much liquid, leading to mushy and unhealthy garlic that may not germinate. Additionally, using overly concentrated solutions, such as high concentrations of hydrogen peroxide, may harm the cloves instead of helping them. It's essential to strike a balance in soaking time and concentration to minimize these potential issues and maximize positive outcomes.
Tips for Preparing Garlic for Planting
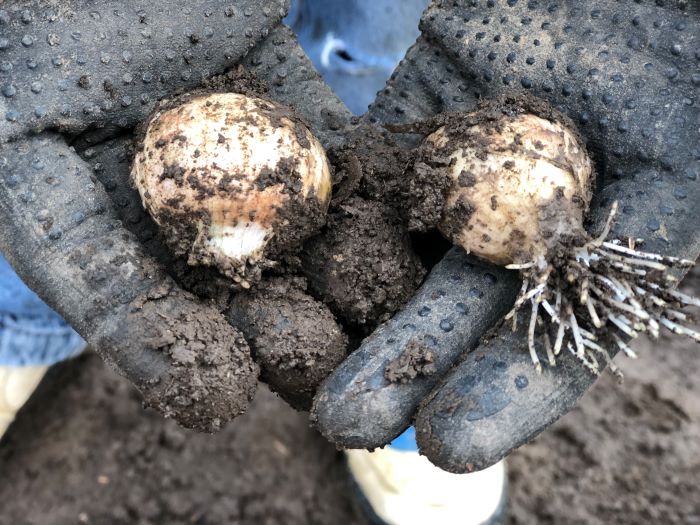
When preparing garlic for planting, it is advisable to select healthy and firm bulbs, as this ensures better growth. Prior to soaking, separating the cloves and discarding any that show signs of disease or damage can improve overall results. After soaking, allow the cloves to dry briefly before planting, ensuring that excess moisture is not introduced into the soil. Following these steps will lead to robust garlic plants that are better equipped to thrive in the garden.
| Solution | Duration | Benefits |
|---|---|---|
| Water | 30 minutes | Basic cleansing |
| Hydrogen Peroxide | 10-15 minutes | Fungal and bacterial elimination |
| Seaweed Extract | Up to 12 hours | Nutrient enrichment |
What should I soak my garlic in before planting?
To prepare garlic for planting, soaking it can help enhance germination and protect it from disease. Here are the recommended solutions and practices:
Soaking Garlic in Water
Soaking garlic bulbs in water is a simple and effective method to promote healthy growth. The act of soaking helps to hydrate the cloves, ensuring that they are ready to sprout once planted. Here’s how to do it:
- Place the garlic cloves in a bowl of room-temperature water.
- Let them soak for about 1 to 2 hours.
- Drain the water and allow the cloves to air dry for a few minutes before planting.
Soaking Garlic in Salt Water
Another beneficial technique is soaking garlic in a mild saltwater solution. This can help to prevent fungal infections and strengthen the garlic's immunity.
- Dissolve approximately 1 tablespoon of salt in a quart of water.
- Soak the garlic cloves for about 30 minutes.
- Rinse the cloves with fresh water to remove excess salt before drying.
Using Hydrogen Peroxide Solution
Soaking garlic cloves in a diluted hydrogen peroxide solution can effectively combat diseases like white rot. This method is particularly useful for those who have experienced issues with root rot in the past.
- Mix one part hydrogen peroxide (3%) with ten parts water.
- Soak the cloves in this solution for 30 minutes.
- Rinse and let the cloves dry completely before planting.
Soaking Garlic in Milk
Milk can be an unconventional option for soaking garlic. The beneficial bacteria in milk can help reduce the chances of mold and improve overall plant health.
See also:
- Mix one part milk with three parts water to create a soaking solution.
- Allow the garlic to soak for about 2 hours.
- Dry the cloves thoroughly before planting them in the soil.
Choosing the Right Time to Soak
Timing is essential when it comes to soaking garlic before planting. Soaking too early can lead to sprouting before planting time, while soaking too late can be ineffective.
- Soak the garlic 1-2 days before planting for optimal results.
- Monitor the cloves to ensure they do not sprout prematurely during soaking.
- Consider local planting schedules to coordinate soaking effectively.
How to prep your garlic for planting?
To prep your garlic for planting, follow these essential steps to ensure a successful harvest. Garlic is best planted in fall or spring, depending on your climate, and proper preparation is key to promoting strong growth and healthy bulbs.
Choosing the Right Garlic Variety
When preparing for garlic planting, it’s important to select a variety that suits your local climate and soil conditions. Different types of garlic, such as hardneck and softneck, have unique growing requirements.
- Hardneck Garlic: Ideal for colder climates, these varieties produce a flower stalk and are known for their robust flavor.
- Softneck Garlic: Better suited for milder climates, they usually yield more cloves and are commonly found in supermarkets.
- Elephant Garlic: A different species that is mild and produces large bulbs, often appreciated for its size and flavor.
Preparing the Bulbs
Once you’ve chosen your garlic variety, the next step is to prepare the bulbs for planting. This ensures that each clove has the best chance of germinating and growing into a healthy plant.
- Separate the Cloves: Carefully break apart the garlic bulbs into individual cloves a few days before planting. Do this gently to avoid bruising.
- Inspect for Damage: Check each clove for signs of disease or mold. Discard any that appear soft, shriveled, or damaged.
- Size Matters: Larger cloves tend to produce larger bulbs. Select the biggest, healthiest cloves for planting and reserve the smaller ones for cooking.
Soil Preparation
Preparing the soil is crucial for growing garlic. Garlic thrives in well-draining soil rich in organic matter, so amend your soil accordingly.
- Testing pH: Garlic prefers slightly acidic to neutral soil (pH 6.0-7.0). Consider testing your soil and amending it if necessary.
- Amending the Soil: Introduce organic matter such as compost or well-rotted manure to improve fertility and drainage.
- Tilling the Soil: Loosen the soil to a depth of at least 8-12 inches to encourage good root growth and moisture retention.
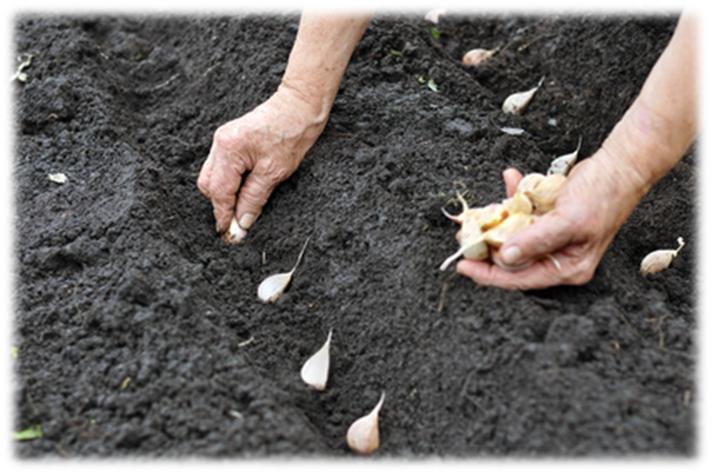
Planting Garlic
The actual planting process is straightforward but requires attention to detail to maximize the success of your garlic crop.
- Timing: Plant garlic in the fall, about 4-6 weeks before the ground freezes, or in early spring once the soil can be worked.
- Planting Depth: Plant cloves with the pointed end facing up, about 2-3 inches deep and spaced 6-8 inches apart.
- Mulching: Apply a layer of mulch after planting to help retain moisture, suppress weeds, and regulate soil temperature.
Watering and Care
After planting your garlic, proper care, including irrigation and pest management, will ensure robust growth throughout the season.
- Watering Schedule: Water garlic regularly but avoid overwatering. The soil should be moist, not soggy, especially during dry spells.
- Weed Control: Keep the planting area free of weeds, which can compete for nutrients and water. Regularly check and manually remove weeds.
- Pest Monitoring: Keep an eye out for pests like aphids and the garlic borer. Use organic pest control methods if necessary to protect your plants.
What should I add to my soil before planting garlic?

To ensure a successful garlic harvest, it's essential to amend your soil with the right nutrients and materials before planting. Garlic thrives in well-draining, nutrient-rich soil. Here are some key components to consider adding to your soil before planting garlic:
Soil pH Adjustments
Before planting garlic, it's crucial to check the soil pH. Garlic prefers a slightly acidic to neutral pH, ideally between 6.0 and 7.0. If your soil's pH is too low (acidic) or too high (alkaline), you can adjust it using the following amendments:
- Liming agents: If your soil is too acidic, add lime to raise the pH.
- Sulfur: To lower the pH of alkaline soil, apply elemental sulfur.
- Testing kits: Use a soil testing kit to determine your soil’s current pH before adding any amendments.
Organic Matter
Incorporating organic matter is vital for improving soil structure and fertility. It helps retain moisture and provides essential nutrients needed by the garlic plants. Consider the following options:
- Compost: Well-rotted compost enriches the soil with nutrients and beneficial microorganisms.
- Manure: Aged manure is an excellent source of nitrogen and can boost soil fertility.
- Mulch: Adding organic mulch can also improve moisture retention and gradually enrich the soil as it decomposes.
Nutrients and Fertilizers
Before planting garlic, it's beneficial to add specific nutrients to promote healthy growth. Using a balanced fertilizer can provide garlic with the needed nutrients during its growing phase. Common additions include:
See also:
- Bone meal: It is rich in phosphorus, which promotes root development.
- Blood meal: A high-nitrogen fertilizer that supports vigorous foliage growth.
- Fish emulsion: This liquid fertilizer provides a quick nutrient boost as garlic starts to grow.
Drainage Considerations
Garlic does not tolerate waterlogged soils, so ensuring good drainage is essential. If your soil retains too much water, consider the following amendments:
- Sand: Incorporating coarse sand can improve drainage in heavy soils.
- Perlite: This lightweight material helps improve aeration and drainage.
- Raised beds: If drainage is a significant issue, consider planting garlic in raised beds to facilitate excess water runoff.
Soil Texture Improvement
The texture of your soil can significantly impact garlic cultivation. A loamy texture, which balances sand, silt, and clay, is ideal for garlic. To enhance soil texture, you might want to consider:
- Organic amendments: Adding peat moss can improve moisture retention and soil structure.
- Gypsum: This helps to break up clay soils, improving drainage and aeration.
- Cover crops: Planting cover crops during the off-season adds organic matter and improves soil structure.
What do you put in a hole when planting garlic?
When planting garlic, it is essential to create the right conditions for optimal growth. The hole into which you plant garlic should ideally include specific components to ensure the cloves receive the necessary nutrients and drainage. Here are the key components to put in a hole when planting garlic:
Soil Preparation
Proper soil preparation is crucial for the successful growth of garlic. Garlic thrives in well-draining, nutrient-rich soil. Before planting, consider amending the soil with the following components:
- Organic Matter: Adding compost or well-rotted manure improves soil structure and provides essential nutrients.
- pH Level: Garlic prefers a soil pH between 6.0 and 7.0. Testing soil pH can help in making necessary adjustments.
- Drainage Aids: If the soil is heavy clay, consider adding sand or perlite to enhance drainage.
Garlic Cloves
The primary component to place in the hole is the garlic cloves themselves. Choosing the right cloves is vital:
- Seed Quality: Use healthy, disease-free bulbs specifically meant for planting rather than those from the grocery store.
- Variety Selection: Different varieties of garlic (hardneck, softneck) may thrive better in specific climates.
- Clove Orientation: Plant the cloves with the pointed end facing up to promote proper growth.
Nutrients and Fertilizers
Incorporating additional nutrients in the hole can enhance garlic development:
- Balanced Fertilizer: Before planting, mix in a slow-release, balanced fertilizer, such as 10-10-10.
- Bone Meal: Adding bone meal provides phosphorus, which is crucial for root development.
- Organic Mulch: Applying a layer of organic mulch can help retain moisture and regulate soil temperature.
Watering Considerations
While not a physical item you add to the hole, watering is an essential component of planting garlic:
- Initial Watering: After planting, water the cloves thoroughly to help settle the soil.
- Moisture Monitoring: Regularly check soil moisture during the growing season to keep the plants healthy.
- Avoid Overwatering: Ensure that the soil drains well to prevent waterlogging, which can lead to rot.
Spacing and Depth
Spacing and depth are critical factors to consider when planting garlic:
- Optimal Depth: Garlic cloves should be planted about 2 inches deep in the soil.
- Spacing: Space the cloves approximately 6-8 inches apart to allow for adequate growth.
- Row Configuration: If planting multiple rows, maintain at least 18 inches between rows for airflow.
Questions from Our Readers
What should you soak garlic in before planting?
To prepare your garlic for planting, it's beneficial to soak it in a solution of water and baking soda for about 30 minutes. This method helps to eliminate any potential pests or fungal infections on the cloves, promoting healthier growth.
How long should garlic be soaked before planting?
Garlic should typically be soaked for about 30 minutes before planting. This time frame is sufficient to ensure that the cloves are treated effectively without causing any harm to the garlic itself.
Can other solutions be used to soak garlic?
Yes, besides water and baking soda, you can soak garlic in a mixture of water and apple cider vinegar or even a diluted hydrogen peroxide solution. These alternatives also help in reducing the risk of disease and encouraging strong root development.
Does soaking garlic affect its growth?
Soaking garlic can positively influence its growth by providing a better start. The soaking process helps to eliminate disease pathogens and can enhance the germination rate, leading to healthier and more vigorous garlic plants.
See also:

If you want to read more articles like What Do You Soak Garlic In Before You Plant It? A Complete Guide for Successful Gardening, we recommend you check out our Garlic category.
Leave a Reply
Related Articles