Essential Guide: What Do You Put on the Bottom of a Compost Bin? Tips for Effective Composting

Composting is an eco-friendly practice that transforms organic waste into nutrient-rich soil. However, achieving the best results relies significantly on the materials placed at the bottom of your compost bin. This essential guide explores the various options and tips for effectively layering your compost bin to enhance aeration, drainage, and microbial activity. By understanding what to put at the base of your compost, you can create an optimal environment for decomposition, ensuring a rich, fertile compost ready for your garden. Dive in to discover the best practices for successful composting and support your sustainable gardening endeavors.
What to Place at the Bottom of a Compost Bin?
To maintain a healthy compost pile, it is essential to start with the right materials at the bottom of your compost bin. Typically, coarse materials are recommended as a base layer to promote good aeration and allow for drainage. This layer can include items such as twigs, straw, or shredded cardboard, which help to create space for air movement and prevent the compost from becoming overly compacted. Furthermore, these materials facilitate the breakdown of organic matter above them by providing essential microhabitats for microbes and promoting oxygen flow, aiding in the decomposition process.
Importance of Coarse Materials
Coarse materials play a vital role in creating a balanced compost environment. By adding materials such as twigs or small branches at the bottom, you ensure that the compost has adequate space for air circulation, which is crucial for the survival of aerobic microorganisms. This aeration helps to accelerate the decomposition process and reduces the chances of unpleasant smells that can occur when anaerobic conditions prevail.
Choosing the Right Materials
When selecting the right materials for the bottom of your compost bin, it’s important to focus on a mix that promotes drainage and aeration. Items like shredded cardboard, straw, or small rocks work well in this context. They provide excellent structure and allow moisture to escape while aiding in preventing the compost from becoming waterlogged, which can hinder the breakdown of organic materials.
Maintaining Aeration
Aeration is crucial to successful composting, and having the right material at the bottom of the bin promotes this process effectively. As layers of organic waste build up above, the bottom materials allow air to flow freely, ensuring that the microorganisms have the oxygen they need to thrive. Over time, a good bottom layer will help in maintaining a balance between moisture, heat, and airflow, which is necessary for optimal composting conditions.
Effect on Compost Temperature
The type of materials placed at the bottom can significantly influence the temperature of your compost pile. Coarse materials can help generate heat as they decompose, creating a warm environment that fosters the activity of thermophilic bacteria. Therefore, ensuring that the bottom layer consists of effective materials will help achieve higher temperatures within the compost bin, enhancing the efficiency of the breakdown process of the organic matter added later.
Table of Recommended Bottom Layer Materials
| Material | Benefits |
|---|---|
| Twigs | Provide aeration and drainage. |
| Shredded cardboard | Helps in moisture retention and aeration. |
| Straw | Maintains structure and promotes airflow. |
| Small rocks | Enhance drainage and aeration. |
What is best to put in the bottom of a compost bin?
To create a successful compost bin, starting with the right materials at the bottom is crucial. The best items to place at the bottom of a compost bin serve to enhance aeration, drainage, and a balanced decomposition process. Here are some recommended materials to use:
1. Branches and Twigs: These provide structure and allow for airflow at the bottom of the bin.
2. Straw or Hay: Helps in absorbing excess moisture and provides carbon.
3. Shredded Cardboard or Newspaper: Serves as a source of carbon and helps in aeration.
4. Wood Chips or Sawdust: Facilitates drainage and can absorb odors while providing carbon-rich material.
5. Cornstalks or Other Dry Plant Material: Suitable for enhancing drainage and aeration.
Benefits of Using Twigs at the Bottom
Using twigs at the bottom of your compost bin can significantly improve decomposition. Twigs allow air to circulate, helping aerobic bacteria thrive. This enhances the breakdown process and reduces odors. Their rigidity also helps maintain an open structure at the base.
- Facilitates airflow for microbial activity.
- Reduces compacting of materials above.
- Improves drainage to prevent waterlogging.
The Role of Straw in Composting
Straw is beneficial when placed at the bottom of a compost bin because it adds a carbon source, which is essential for a balanced compost mix. Its lightweight structure promotes airflow, which helps in maintaining aerobic conditions necessary for efficient decomposition.
- Helps in moisture retention while avoiding over-saturation.
- Provides a healthy balance of carbon to nitrogen.
- Encourages beneficial microbial action.
Using Shredded Cardboard for Aeration
Shredded cardboard plays a crucial role in compost bins as a source of carbon. When placed at the bottom, it helps to create voids for air circulation, which is necessary for the composting process. It also absorbs excess moisture, preventing a soggy mass.
- Enhances aeration for better microbial activity.
- Balances the carbon-to-nitrogen ratio.
- Helps maintain an appropriate moisture level.
Importance of Wood Chips
Wood chips are an excellent material to place at the bottom of a compost bin. They provide structure, allow for proper drainage, and absorb excess moisture. Additionally, wood chips break down slowly, releasing nutrients over time, which is beneficial as your compost matures.
See also:
- Facilitates long-term carbon contribution.
- Prevents compacting and helps maintain airflow.
- Minimizes foul odors by absorbing strong smells.
Using Cornstalks for Improved Drainage
Cornstalks are an effective addition at the bottom of a compost bin, as they boast a hollow structure that promotes airflow while aiding in proper drainage. The organic material will decompose, contributing beneficial nutrients to the compost.
- Allows excess water to flow away from the compost.
- Can help increase the overall volume of compost over time.
- Supports aeration for microorganisms to thrive.
What are the 5 mistakes that people commonly make when composting with worms?

Composting with worms, or vermicomposting, is a fantastic way to recycle kitchen waste and create nutrient-rich fertilizer for gardens. However, beginners often make several common mistakes that can hinder the effectiveness of the process. Here, we explore five such mistakes in detail.
1. Overfeeding the Worms
Overfeeding is one of the most prevalent mistakes made by novice vermicomposters. Worms have a limited capacity to consume organic material, and providing them with too much food can lead to issues such as odor and pests.
- Understanding feeding limits: It's crucial to feed worms only a small amount at a time.
- Monitoring their intake: If uneaten food starts to accumulate, reduce the amount you are adding.
- Balancing food types: Mix different types of kitchen scraps to keep a varied diet for the worms.
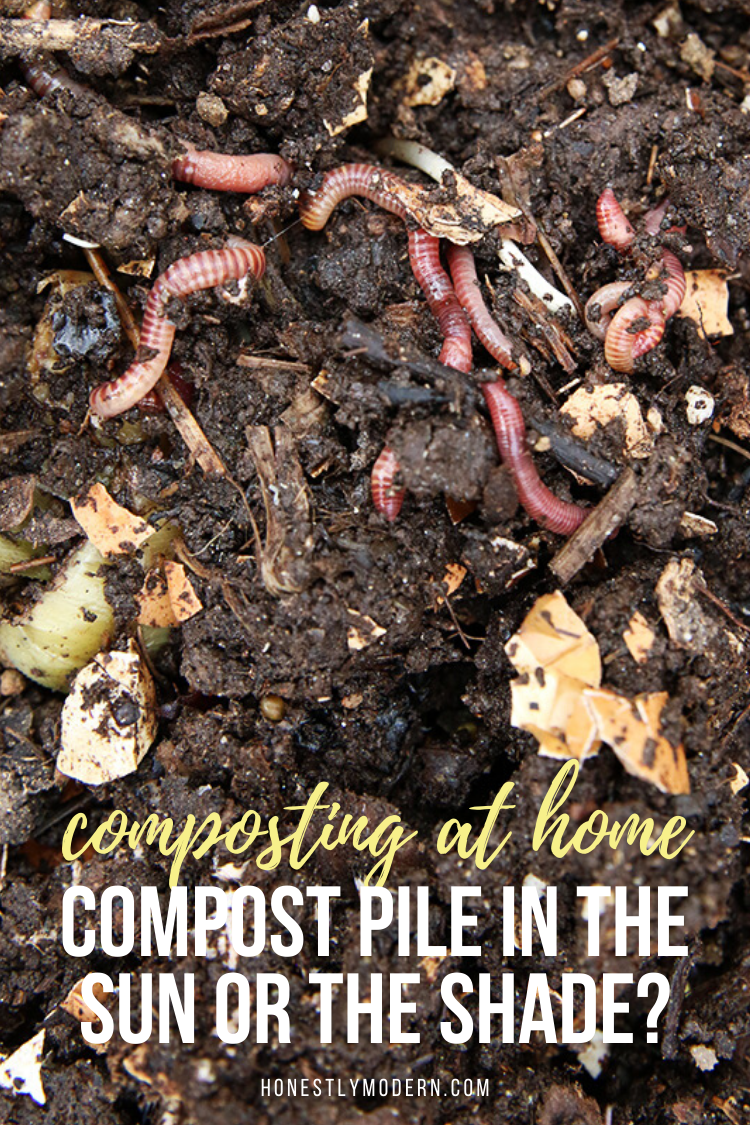
2. Using the Wrong Type of Worms
Not all worms are suitable for composting; many people mistakenly use earthworms rather than the preferred red wigglers (Eisenia fetida) or red worms.
- Choosing the right species: Red wigglers are well-suited for indoor and outdoor composting.
- Understanding habitat needs: Some worms require specific conditions that differ from common earthworms.
- Acquiring worms: Always purchase worms from reputable sources to ensure quality and health.
3. Ignoring Moisture Levels
Moisture is vital for a healthy vermicomposting environment. Many beginners fail to monitor the moisture content in their worm bins, which can lead to either overly wet or dry conditions.
- Maintaining moisture: The compost should feel like a wrung-out sponge; too wet can drown worms, and too dry can desiccate them.
- Adjusting materials: Add dry materials like shredded cardboard or newspaper if the bin is too wet.
- Check regularly: Regularly checking moisture levels can allow for timely adjustments.
4. Incorrect Temperature Management
Temperature plays a critical role in the composting process, yet many users overlook this aspect. Ideal temperatures range between 55°F and 77°F (13°C to 25°C).
- Monitoring temperature: Use a thermometer to check the temperature of the compost regularly.
- Avoiding extreme temperatures: Place the worm bin in a climate-controlled environment to prevent overheating or freezing.
- Recognizing signs: If worms are trying to escape, it may indicate they are uncomfortable due to temperature.
5. Neglecting pH Levels
The pH level of the compost can significantly affect worm health and activity. Many composters fail to monitor pH, which should ideally be between 6.0 and 7.0.
- Testing pH: Use a pH meter or test strips to regularly monitor acidity levels.
- Adding corrective materials: If the pH is too low, incorporate crushed eggshells or lime to balance it.
- Learning about food impact: Some food scraps, like citrus peels, may lower the pH and should be used sparingly.
What is the best base for a compost pile?

The best base for a compost pile typically consists of a mix of carbon-rich materials (browns) and nitrogen-rich materials (greens). Establishing an effective compost pile starts with using the right base to ensure optimal decomposition and nutrient creation. A good base helps support the microbial activity necessary for breaking down organic matter. The ideal base often includes materials that create airflow, retain moisture, and provide essential nutrients.
Choosing the Right Location
The location of your compost pile is crucial to its success. An optimal spot can enhance decomposition and make management easier. Consider the following factors:
- Accessibility: Choose a location that is easy to reach for adding scraps and turning the pile.
- Sunlight: A spot that receives partial sunlight can help maintain warmth, aiding in the breakdown of materials.
- Drainage: Ensure the area has good drainage to prevent waterlogging, which can lead to a foul smell.
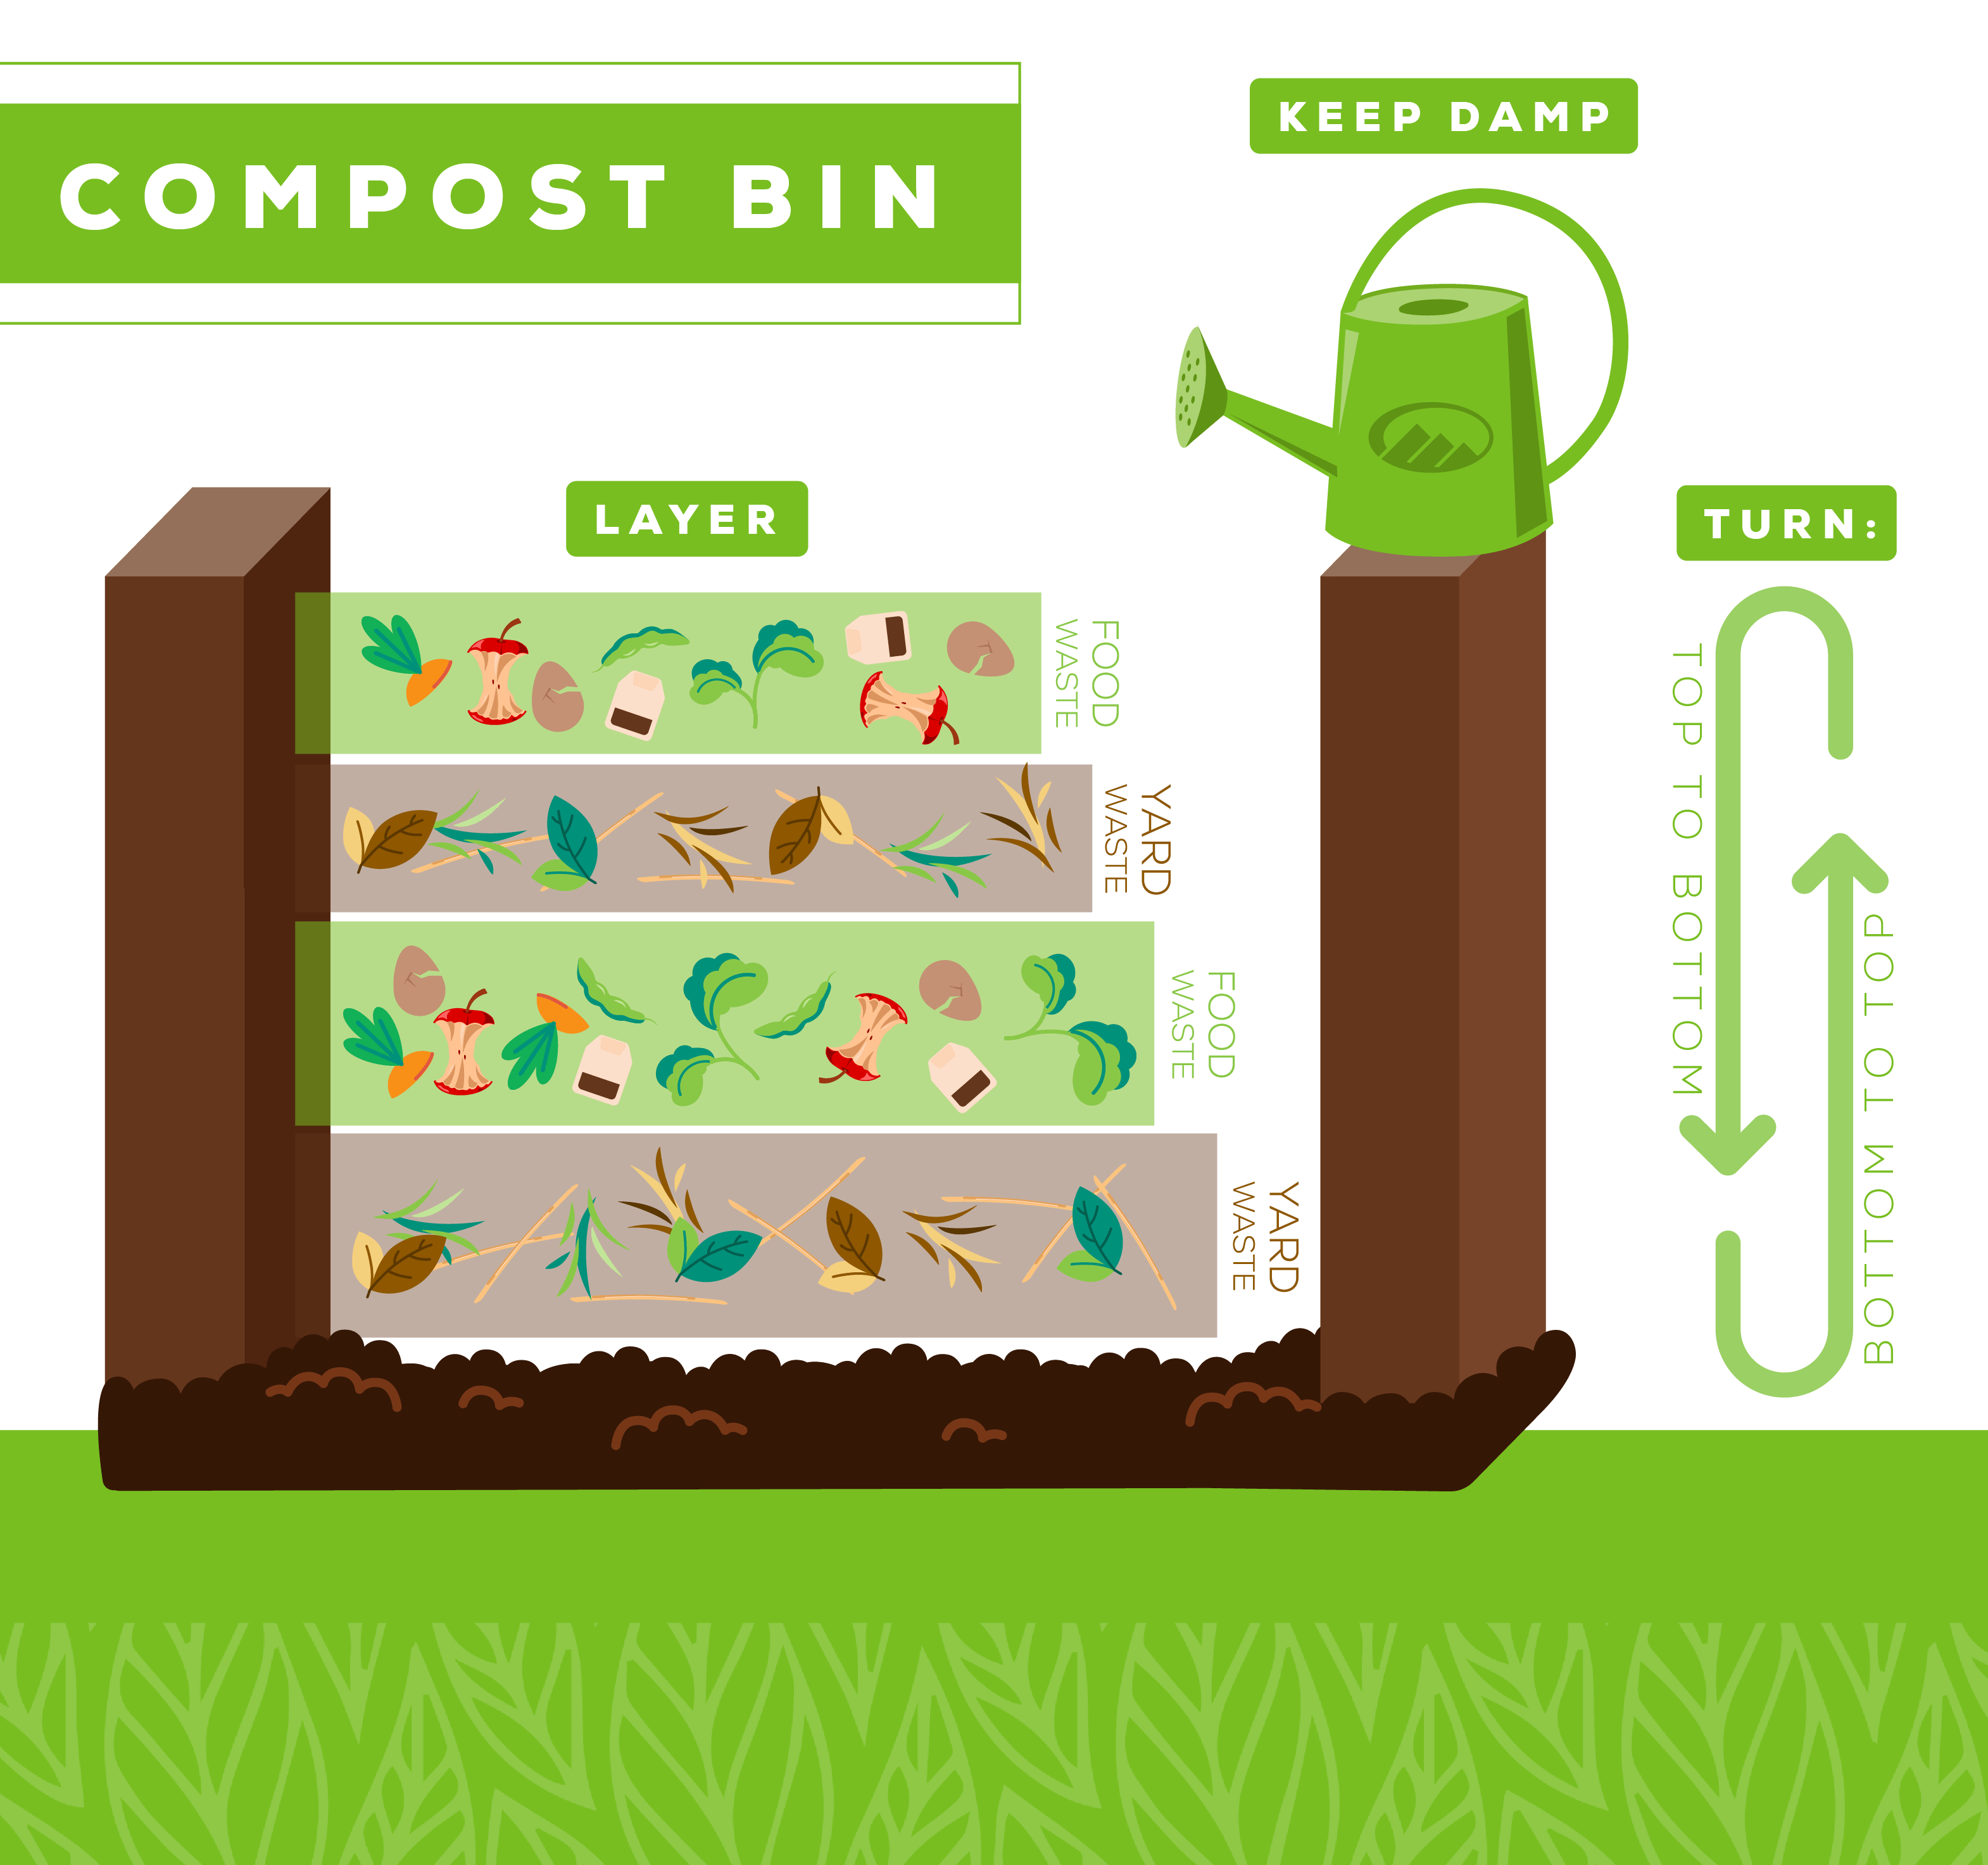
Layering Materials Properly
Creating layers in your compost pile is vital for balancing moisture and air flow. This layering helps in the aeration of the pile and enhances microbial activity. Proper layering typically involves:
- Browns: Start with a base of carbon-rich materials like dried leaves, straw, or shredded paper.
- Greens: Add nitrogen-rich materials, such as kitchen scraps (vegetable peels, coffee grounds) and grass clippings, on top of the browns.
- Repeat: Alternate between browns and greens, ensuring a well-balanced mixture that is not too wet or dry.
Maintaining Proper Moisture Levels
Moisture is essential for microbial activity in your compost pile. The right moisture level keeps the composting process efficient and promotes decomposition. To maintain proper moisture:
See also:
- Check regularly: Always check the moisture by grabbing a handful; it should feel like a wrung-out sponge.
- Add water: If it's too dry, add water evenly throughout the pile until it reaches the desired moisture.
- Aeration: Turning the pile regularly helps redistribute moisture and aerate the mixture.
Incorporating Microbial Activators
Introducing microorganisms can enhance the composting process by accelerating decomposition. This is particularly useful for establishing your base. Consider these activators:
- Compost starter: These products contain beneficial microbes that help kickstart the decomposition process.
- Soil: A small amount of garden soil can introduce microbes and nutrients into your compost pile.
- Adding aged compost: Mixing in some finished compost can introduce active organisms to speed up the process.
Regularly Turning the Pile
Turning the compost pile is essential for ensuring that all materials break down evenly and prevents anaerobic conditions, which can lead to odors. To manage this effectively:
- Frequency: Turn the pile every few weeks to incorporate oxygen and promote even decomposition.
- Use proper tools: A pitchfork or compost aerator can help mix the materials thoroughly.
- Monitor temperature: A well-aerated pile should reach higher temperatures (130-160°F) indicating active composting.
Is it better to compost in the sun or shade?
When deciding whether it is better to compost in the sun or shade, both options have their respective advantages and drawbacks. The choice largely depends on the local climate, the materials being composted, and the intended use of the compost.
The Benefits of Composting in the Sun
Composting in the sun can accelerate the decomposition process due to higher temperatures. This method is especially effective in warm climates. Here are some benefits of sun exposure in composting:
- Increased Temperature: Higher temperatures can enhance microbial activity, which speeds up the breakdown of organic materials.
- Faster Drying: Sunlight helps to dry out wet compost, preventing smells and promoting a balanced carbon-to-nitrogen ratio.
- Pest Deterrent: Warm temperatures may deter some pests that thrive in cooler, moist conditions.
Advantages of Composting in the Shade
Composting in the shade provides a cooler environment that can be beneficial in certain circumstances. Here are the advantages of shaded composting:
- Moisture Retention: Shade can help retain moisture within the compost pile, which is crucial for microbial activity.
- Reduced Risk of Overheating: In particularly hot climates, shade can prevent compost from reaching excessively high temperatures that might kill beneficial microbes.
- Weed Control: Shady areas are less likely to encourage weed growth in the compost pile than sunnier spots.
Impact of Climate on Composting
The effectiveness of composting in sun or shade is significantly influenced by the local climate. Consider the following points:
- Hot Climates: In warm areas, composting in the shade may be preferable to prevent overheating.
- Cold Climates: In cooler regions, sun exposure can help maintain the heat needed for efficient decomposition.
- Humidity Levels: High humidity can benefit shaded composting, whereas dry heat may favor sunlit piles.
Types of Materials Being Composted
Different compost materials react differently based on sun and shade. Here’s how to consider your composting materials:
- Wet Materials: Items like fruit scraps may benefit from shade to prevent them from drying out too quickly.
- Dry Materials: Such as straw or dry leaves, can be decomposed more effectively in sunlight to promote heat generation.
- Balanced Mix: A varied mix of greens and browns can adapt well to both sunlight and shade but requires monitoring for moisture levels.
Conclusion on Location Choice
Ultimately, the choice between sun and shade for composting should be based on the specific conditions of your choice of location. Key considerations include:
- Accessibility: Ensure that the chosen spot is easy to manage.
- Surrounding Environment: Evaluate the surrounding plants and structures that could affect moisture and temperature.
- Personal Preferences: Consider your own preferences for composting visibility and maintenance.
Questions from Our Readers
What is the best material to put at the bottom of a compost bin?
To start your compost bin, it is best to use coarse materials at the bottom, such as twigs, straw, or shredded cardboard. These materials help promote air circulation and facilitate drainage, which is essential for creating a healthy compost environment.
Should I add soil to the bottom of my compost bin?
Adding a small amount of garden soil at the bottom of your compost bin can introduce beneficial microorganisms that will help break down organic matter. However, it is not necessary, as the composting process can occur effectively without it.
Can I use newspaper at the bottom of a compost bin?
Yes, you can use shredded newspaper at the bottom of your compost bin as a carbon-rich material, but ensure it is mixed well with other materials. This will help absorb excess moisture and improve aeration, contributing to a balanced compost pile.
How much material should I put at the bottom of the compost bin?
A layer of about 3 to 5 inches of coarse materials is recommended at the bottom of the compost bin. This layer provides a solid foundation for air circulation and helps manage moisture levels, which are crucial for effective composting.
See also:

If you want to read more articles like Essential Guide: What Do You Put on the Bottom of a Compost Bin? Tips for Effective Composting, we recommend you check out our Compost category.
Leave a Reply
Related Articles