Ultimate Guide: How to Make a Homemade Compost Bin? Tips and Tricks for Beginners

Creating your own compost bin is an excellent way to reduce waste and produce nutrient-rich fertilizer for your garden. For beginners, this ultimate guide will walk you through various methods to build a homemade compost bin, offering practical tips and tricks to ensure your composting journey is successful. By understanding the basics of composting, including what materials to use and how to maintain your bin, you can contribute to a healthier environment while promoting sustainable practices. Whether you have a spacious backyard or limited space, there's a composting solution that fits your needs. Let's dive in and get started!
How to Create a Simple Homemade Compost Bin
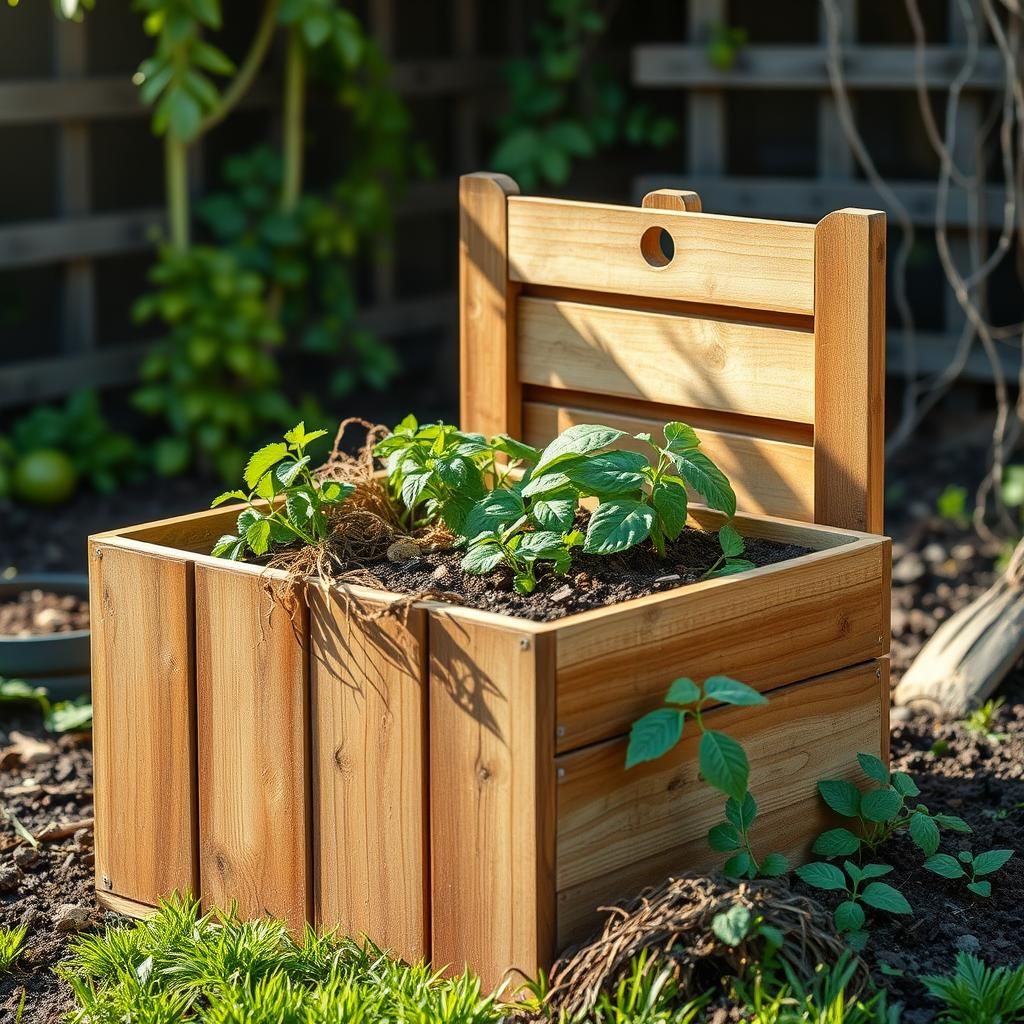
To create a simple homemade compost bin, start by selecting a suitable location in your yard that has good drainage and sunlight. You can architect the bin using wooden pallets, wire mesh, or an old trash can. If using pallets, create a square shape by propping the pallets together, leaving one side open for easy access. Ensure proper air circulation by allowing space between the materials, and add a mix of green materials like kitchen scraps and dried leaves, which are considered brown materials. Keep the compost moist but not too wet, turning it regularly to enhance aeration and speed up the decomposition process.
Choosing the Right Location
When selecting a location for your compost bin, consider a spot that is easily accessible and receives adequate sunlight. This will help maintain warmth, promoting the growth of beneficial microorganisms that accelerate decomposition. Avoid shaded areas and places that hold water, as these can hinder the composting process. Furthermore, ensure it's close to your kitchen for convenience, allowing you to easily dispose of organic waste.
Materials Needed for Your Compost Bin
To construct your compost bin, you will need durable materials such as wooden pallets, wire mesh, or an old container like a garbage can. Additionally, gather composting essentials including green materials (e.g., vegetable scraps, grass clippings) and brown materials (e.g., dry leaves, cardboard). Having a pitchfork or compost aerator handy will also aid in turning the compost.
Maintaining Proper Compost Conditions
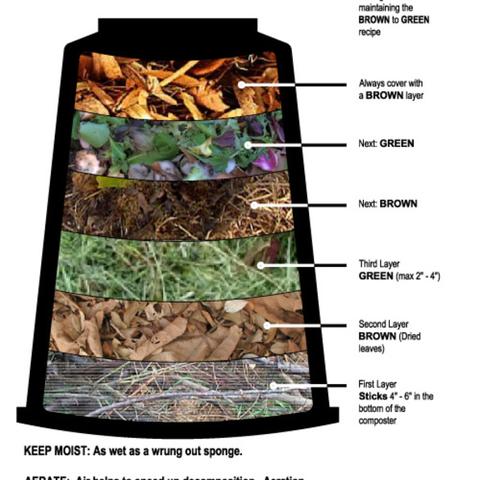
Maintaining proper conditions in your compost bin is essential for effective decomposition. Aim for a balance of green and brown materials, as this will provide the necessary nitrogen and carbon ratios. Monitor moisture levels, ensuring the compost is damp like a wrung-out sponge, and turn it every few weeks to aerate and incorporate oxygen. Keeping the compost pile warm will help speed up the breakdown of materials.
What Not to Add to Your Compost Bin
It's crucial to avoid adding certain materials to your compost bin that can hinder decomposition or introduce unwanted pests. Items such as meat, dairy, and oils should be excluded, as they can attract animals and produce foul odors. Also, avoid adding cooked food, diseased plants, or weeds with seeds, as these can contaminate your compost and result in poor quality fertilizer.
How Long Does It Take to Compost?
The time it takes for compost to mature can vary widely, typically ranging from three months to a year, depending on various factors such as the type of materials used, moisture content, and how often you turn the pile. Composting at a higher temperature usually accelerates the process, while a cooler environment may slow it down. Regularly monitoring the pile’s conditions and making adjustments will help you achieve usable compost more quickly.
| Activity | Timeframe |
|---|---|
| Initial setup of the compost bin | 1 day |
| Regular turning of materials | Every 2-4 weeks |
| Decomposition period for compost | 3-12 months |
| Final readiness assessment | After 1 year |
What are two mistakes that we should avoid when we prepare compost?

When preparing compost, it’s essential to ensure proper techniques to create nutrient-rich soil. Here are two common mistakes to avoid:
1. Not Balancing Green and Brown Materials: One of the significant errors in compost preparation is failing to achieve a proper ratio of green (nitrogen-rich) to brown (carbon-rich) materials. The ideal ratio is approximately 1:3, with more brown materials than greens. Imbalance can lead to ineffective decomposition and odors.
2. Ignoring Aeration: Another mistake is neglecting the need for aeration. Compost requires oxygen to break down efficiently. Without adequate aeration, materials can become compacted, leading to anaerobic conditions, which can result in unpleasant smells and slow decomposition.
See also:
Understanding Green and Brown Materials
Green materials are typically fresh, moist, and rich in nitrogen, while brown materials are dry and high in carbon. Recognizing these categories is crucial for achieving the right balance.
- Green materials include food scraps, grass clippings, and coffee grounds.
- Brown materials include dried leaves, branches, and shredded paper.
- Mixing these in the right proportions will enhance the composting process.
Importance of Proper Ratios
Maintaining the correct ratio of green to brown materials promotes efficient decomposition and nutrient production. This is essential for creating healthy compost.
- Too many greens can cause the compost to become smelly and slimy.
- Too many browns can slow down decomposition significantly.
- Regularly monitor and adjust the mixture to achieve the correct ratio.
Methods for Aerating Compost
Aeration is vital for maintaining oxygen flow within the compost pile. There are several effective methods to ensure proper aeration.
- Turn the compost regularly using a pitchfork to mix and introduce air.
- Add materials in layers, alternating between greens and browns for better airflow.
- Consider using a compost aerator tool for deeper aeration.
Identifying Signs of Poor Composting
Recognizing when compost is deteriorating is critical for making necessary adjustments. Signs of poor composting include unpleasant odors, excessive wetness, or a lack of heat.
- Foul smells indicate anaerobic conditions needing immediate attention.
- Sogginess can suggest excessive green materials or inadequate aeration.
- A cold pile may indicate a lack of microbial activity due to improper materials.
Understanding the Role of Microbes
Microorganisms play a crucial role in the breakdown of organic material during composting. A healthy microbial community ensures rapid and efficient composting.
- Introduce diverse materials to support a wide range of microbial life.
- Maintain moisture levels to keep microbes active and thriving.
- Avoid chemical additives that can harm beneficial microorganisms.
What is the laziest way to compost?

The laziest way to compost involves minimal effort and maintenance while still allowing for the transformation of organic waste into nutrient-rich compost. This method is often referred to as lazy composting or no-turn composting, and it typically combines simple techniques that can fit into any lifestyle. Here are a few strategies to achieve this:
Using a Compost Bin
A simple way to start lazy composting is by using a compost bin. This method minimizes maintenance and helps contain odor and pests. You can purchase or build a compost bin that fits your yard or kitchen.
- Low Maintenance: Once you add your organic waste, you can leave it without turning it frequently.
- Space-Saving: A bin keeps the compost contained, which reduces mess and can fit small spaces.
- Pest Control: A closed bin helps shield your compost from animals and reduces unpleasant smells.
Direct Composting
Direct composting involves simply adding organic waste to a designated area in your garden or yard. This method is incredibly straightforward and requires virtually no planning.
- Quick Disposal: Just throw your kitchen scraps directly onto the soil.
- Natural Decomposition: The waste will break down over time with the help of microorganisms and worms.
- Enriching the Soil: Over time, the decomposing organic matter will enhance the soil quality directly in your garden.
Heap or Pile Composting
Creating a simple compost pile is another lazy composting method. You can layer food scraps and yard waste in a heap without needing to turn it regularly.
- Effortless Setup: Just start piling organic waste in a corner of your yard.
- Layering: Alternate between green materials (nitrogen-rich) like fruit scraps and brown materials (carbon-rich) such as dried leaves.
- Natural Process: Over time, nature will take care of the breakdown process, requiring little intervention.
Using Bokashi Fermentation
Bokashi is an anaerobic fermentation method that is easy to implement and allows for composting in a much shorter timeframe. This method can be done indoors, making it perfect for apartment dwellers.
See also:
- Quick Composting: Bokashi can ferment waste in just a few weeks.
- Odor Control: The fermentation process can minimize unpleasant smells associated with composting.
- Versatile: You can compost almost any organic material, including meat and dairy.
No-Cook Composting
This method allows you to compost by simply letting organic waste decompose naturally without any additional preparation, such as cooking scraps.
- Easy Disposal: Just toss your leftover food or plant materials onto your compost pile or bin.
- Natural Timeline: The composting process occurs at its own pace, and no extra effort is needed.
- Environmentally Friendly: By not cooking or altering the scraps, you save energy and resources while reducing waste.
What should be at the bottom of a compost bin?

To create an effective compost bin, it is crucial to understand what should be placed at the bottom. The base of a compost bin should support proper aeration and drainage, as this is essential for the decomposition process. A well-prepared bottom layer can significantly enhance the overall efficiency of your compost.
Importance of Drainage
Proper drainage is vital for any compost bin. Without it, the compost can become overly wet, leading to unpleasant odors and a slowdown in decomposition. To achieve adequate drainage, consider the following materials:
- Small Twigs – They create air pockets that allow water to move through the compost.
- Straw or Hay – These materials not only help with drainage but also add carbon to the mix.
- Wood Chips – They can absorb excess moisture and also provide structure to the compost.
Creating Aeration
Aeration is essential for promoting aerobic bacteria that assist in breaking down organic materials. A good base layer facilitates airflow, essential for a healthy compost pile. To enhance aeration:
- Open-Cell Materials – Items like crumpled newspaper or cardboard can help to hold air spaces.
- Roughage – Adding coarse materials like dry leaves can promote better airflow.
- Pine Needles – These provide light structure and create gaps for air circulation.
Layering Carbon and Nitrogen
The bottom of your compost bin is a great place to start layering your carbon and nitrogen materials. Balancing these materials is key for effective composting. Consider these options:
- Brown Materials – These include dry leaves, straw, and paper that are high in carbon.
- Green Materials – Fresh grass clippings and kitchen scraps that are rich in nitrogen should be added above the brown layer.
- Coffee Grounds – Used coffee grounds can provide a nitrogen boost and help your compost break down faster.
Using a Base Layer of Soil
Some gardeners prefer to start their compost bin with a thin layer of soil. This method can introduce microorganisms that help in breaking down the organic matter. Here’s how:
- Microorganisms – Soil contains beneficial bacteria and fungi that jumpstart the decomposition process.
- Nutrients – Adding soil can enrich the compost with essential nutrients that benefit your plants later.
- Moisture Retention – Soil can help retain moisture at the bottom, which is necessary for the decomposition of organic matter.
Preventing Pests
To deter pests from invading your compost pile, it is important to carefully consider your bottom layer. Here are effective strategies:
- Coarse Textures – Use materials such as wood chips or small branches to create a barrier that is difficult for pests to penetrate.
- Covering with Soil – A thin layer of soil on top of the base can deter insects and rodents from getting into your compost.
- Avoid Food Scraps – Refrain from placing readily attractive food scraps at the bottom, as they can attract unwanted pests.
Questions from Our Readers
What materials do I need to build a homemade compost bin?
To create a homemade compost bin, you'll need wooden pallets or wire mesh for the structure, along with soil, green waste (like fruit and vegetable scraps), and brown waste (such as dried leaves and cardboard) to layer inside the bin. It's important to have a good balance of these materials to promote decomposition.
How big should my compost bin be?
The size of your compost bin can vary, but a good starting point is around 3 feet by 3 feet. This size allows for proper aeration and heat retention, which are crucial for speeding up the composting process. Larger bins can also be effective, but they require more materials to fill.
How do I maintain my compost bin?
To maintain your compost bin, it’s essential to turn the compost every few weeks to aerate it and promote decomposition. Ensure you maintain a balanced mix of green and brown materials and monitor moisture levels; if it’s too dry, add water, and if it’s too wet, add more dry materials.
See also:
How long does it take for compost to be ready?
The time it takes for compost to be ready can vary from a few weeks to several months, depending on factors like the size of the materials, moisture levels, and how often you turn the compost. Generally, with proper care and the right conditions, you can expect to have rich, dark compost within 3 to 6 months.

If you want to read more articles like Ultimate Guide: How to Make a Homemade Compost Bin? Tips and Tricks for Beginners, we recommend you check out our Compost category.
Leave a Reply
Related Articles